Monthly Archives: August 2015

3 Simple Steps to Create a Visual Web Part in SharePoint

What is a Web Part?

SharePoint Web Part is basically a reusable component designed for a particular task and can be easily added to a
SharePoint page for customization/personalization. But for me as a developer, its a user control that is deployed at Site Collection level so that all sites under the site collection can reuse it.

Types of a SharePoint Web Part?

There are two types of Web Parts in SharePoint:

  • Standard/Traditional Web Part
  • Visual Web Part

The primary difference is that visual web part has the flexibility to drag and drop items on our canvas giving us a designer experience. While standard web part doesn’t have that flexibility and we have to manually do the coding stuff. There are other important differences between the two types of web parts but we are not going into that much details here. For detailed difference, you can visit Microsoft Online MSDN here.

Purpose:

In this article, we will learn how to create Custom Visual Web Part using Visual Studio? and further how to add data from Visual Web Part to a SharePoint list?

Pre-Requisites?

  • SharePoint 2013
  • Visual Studio 2012

Step 1: Creating a Custom List in SharePoint Site

  1. Create custom list “Employee” in your SharePoint site.
  2. Add following columns in newly created list.
    • Name
    • Phone No
    • Address

We already have discussed and implemented two simple ways to Create a Custom List in SharePoint 2013 in previous article on Code Project here.

Step 2: Creating a Visual Web Part

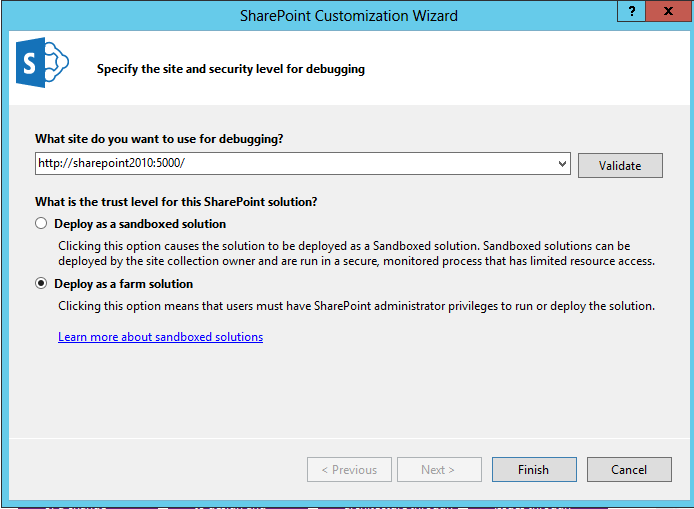
  1. Create a new Empty SharePoint 2013 Project.SharePoint Customization Wizard
  2. Provide SharePoint site URL, where you want to deploy your solution and select “Deploy as a farm solution” option.
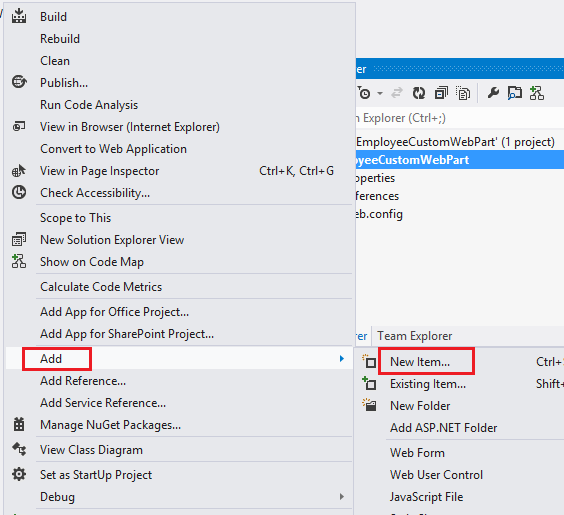
  3. Now, Right Click the Project, then Select “Add” and click the “New Item” link in the context menu.Add New Item to SharePoint 2013
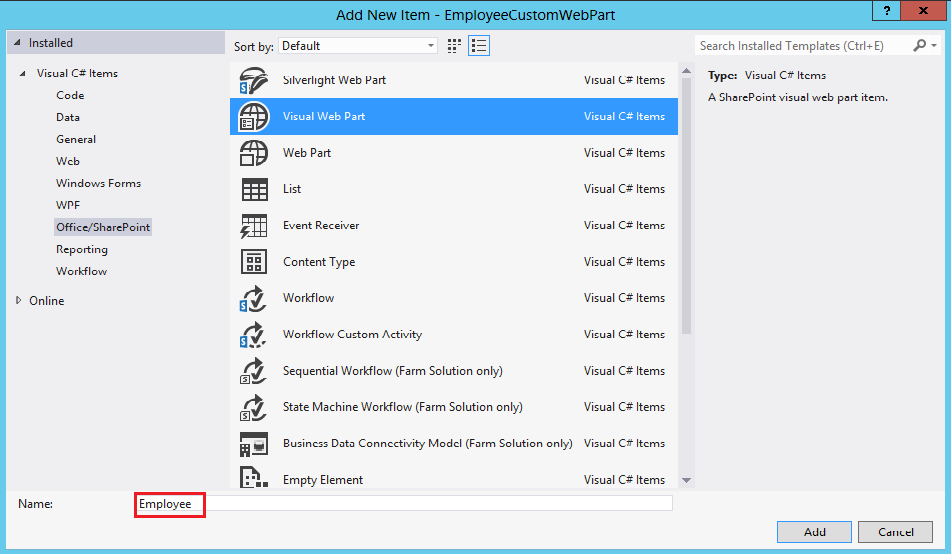
  4. This invoke the “Add New Item” window. In the “Visual C# Section” Templates, select “Visual Web Part”.
  5. Provide a name for the Visual Web Part and click “Add” button to add it to the SharePoint Project.Employee Custom Web Part
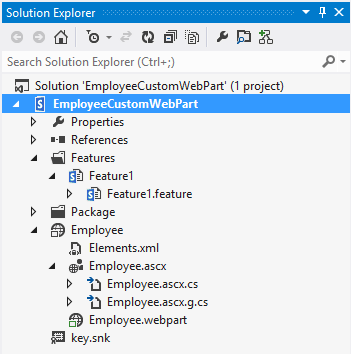
  6. This will add a new Site Collection scoped Feature to the SharePoint project along with the newly added Visual Web Part. This WebPart will be automatically added to the feature. This you can find out by double clicking the feature file.Web Part Solution
    Web Part Solution
  7. Double Click the .ascx file created in Step 5. Add controls that are required for Visual Web Part by expanding the Toolbox pane available in the left hand side of Visual Studio.Visual Web Part
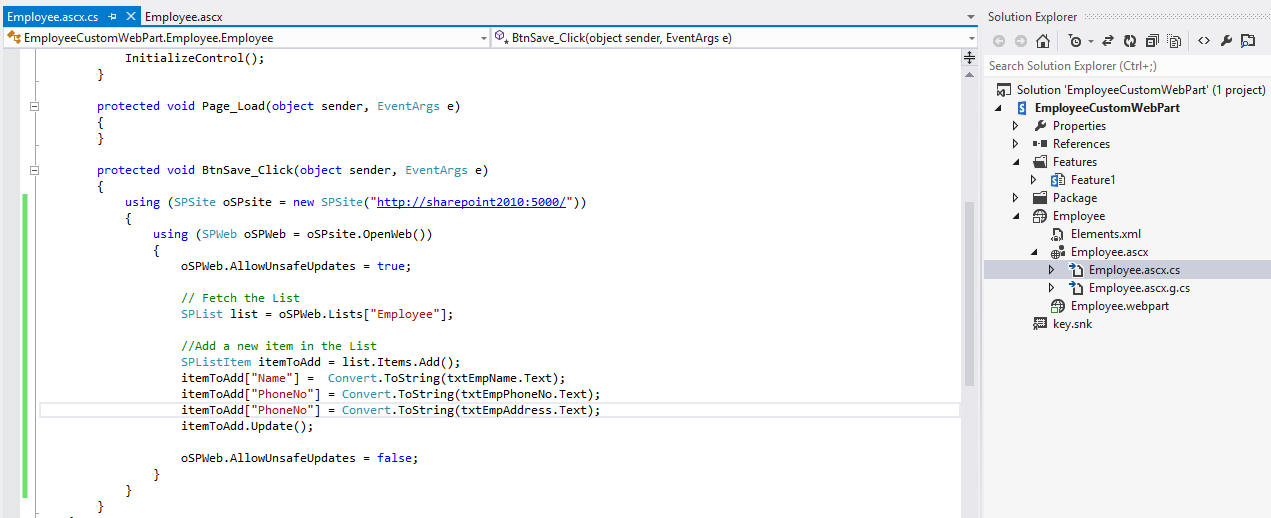
  8. Double click the Save button, it will open .cs file. Add following code in button click event.Save Visual Web Part
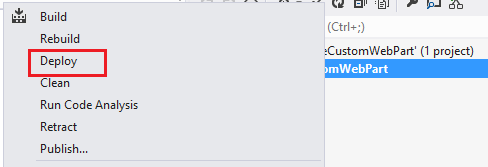
  9. Now, right click the solution and click on Deploy option.Deploy Custom Web Part
  10. This process will deploy solution on the SharePoint site and add your custom web part in web part gallery.

We have successfully created and deployed a simple Visual Web Part using SharePoint 2013.  But more useful Web Parts can be developed to simplify specific organizational needs. There are many built-in Web Parts available in SharePoint like Chart Web Part, Content Query Web Part etc.

Also, we can have a Custom Web Part that can read data from several data sources and present in more helpful way with multiple views. SharePoint Calendar Web Part is an excellent example that shows all events from different data sources including Exchange, SharePoint List, Google, SalesForce, SQL Table or XML and further present in multiple views. Let’s follow the step 3 to add our Web Part to a Page.

Step 3: Add Web Part to the Page

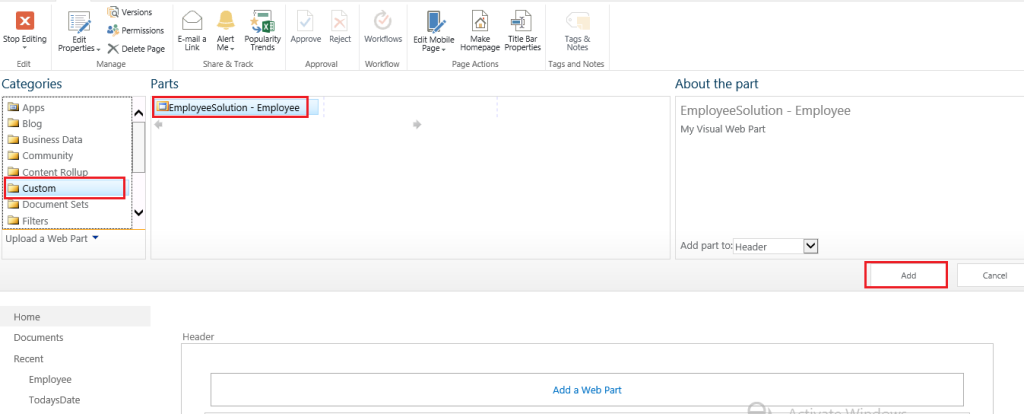
  1. To add the newly created webpart which we have developed, Open the page and click on the edit page option. From the insert tab, select webpart icon. Choose the custom webpart which we have deployed from custom category and click on Add button.Add Web Part
  2. It will add custom web part on the SharePoint site.Employee Info as Web Part
  3. Now fill-up all information and click on save button. This information will be save in SharePoint ‘Employee’ list.

Hopefully, we understand now that how simple is to create a Visual Web Part in SharePoint 2013 and use it in our pages.

How to Create a Task List in SharePoint 2013?

Task List in SharePoint 2013

Tasks lists in SharePoint are used for capturing actions, to-dos, and deadlines. Whenever multiple people are working together to deliver on time a joint project or initiative you need some way of effectively communicating what everyone is supposed to do. You also track what everyone has (or has not) done in order to manage the project properly.

Benefits of using Task List in SharePoint 2013

  • Faster and easier user interface.
  • More flexibility with tasks and sub tasks.
  • Improved project insight with colors and a graphical timeline.
  • Enhanced accessibility with a mobile view of the task list.

In this article we will follow the below steps to learn about the following features:

  • Create Task List.
  • Creating New Task in SharePoint 2013.
  • Delete a Task
  • SharePoint Timeline

It’s really easy for developers having background in ASP.NET Technology to grasp these SharePoint related concepts easily.

Creating a Task List in SharePoint 2013

  1. Login with SharePoint site.
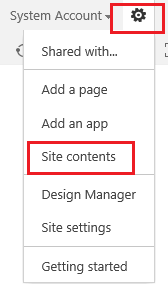
  2. Navigate to Site and Click on “Settings” option and then click on “site contents” option.Task List in SharePoint 2013
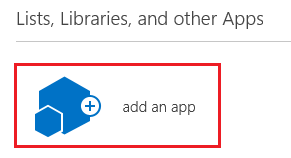
  3. Then click on “add an app” option.SharePoint List & Libraries
  4. Then click on “Tasks” option from your app.SharePoint Tasks
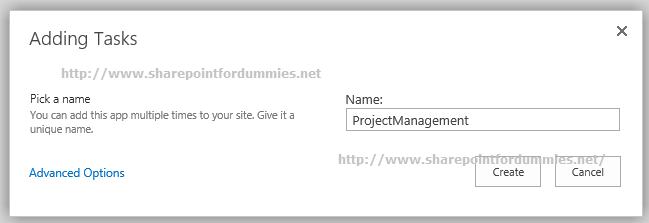
  5. Give the Task Name and click on create button.Adding Tasks
  6. It will create new task list, where you can manage your task relevant to project.Project Management Tasks

Creating New Tasks in SharePoint 2013

  1. Open the create task list and click on “New Task” icon.New Task in SharePoint 2013
  2. Add all relevant information and it will create one task in task library.SharePoint 2013 Task Details
  3. These task also assigned to relevant user, so whenever assigned user login with site, he can find this task and start working on it. He/She can also add task progress so all are aware of task’s progress.

Deleting a Task in SharePoint 2013

  1. Login as admin user and open task list.
  2. Select relevant task and open it. After that click on Delete button from ribbon task. This task will be deleted from task list.Deleting Task in SharePoint 2013

SharePoint Timeline

Users have the ability to display or remove tasks or sub tasks from the timeline.

How to Add a Task in Timeline? – When you create a task click on “…” to open task preview window. Here you can select “Add to Timeline” to add the task to the above timeline. You can remove it from same way with “Remove from timeline”.Adding Task to Timeline in SharePoint 2013

Hopefully, this SharePoint for dummies article enables SharePoint 2013 users to understand how to create Task List, add tasks to Task List, Remove the Tasks from Task List (if required) and  add/removes tasks from their timeline.

More related from Microsoft SharePoint For Dummies:

3 steps to create a Workflow using SharePoint Designer

Microsoft SharePoint Designer Workflow

Workflows are now important part of any project. We can develop a Microsoft SharePoint Workflow using the available templates, SharePoint designer and Visual Studio. In this article will mainly focus on workflow creation using Microsoft SharePoint Designer.

Advantages:

  • Basic workflow can be implemented by trained users.
  • Relatively quick to implement for low complexity workflow.

Dis-Advantages:

  • No built-in source control.
  • Difficult to deploy to other environments.
  • Sequential workflow only.

Workflow created in three ways using Microsoft SharePoint designer:

  1. List workflow
  2. Reusable workflow
  3. Site workflow

Note: In this SharePoint for dummies tutorial you will learn simple basic workflow, where current date set in list item through SharePoint designer. I have used SharePoint Designer 2010 for implementation purpose but process will remain same if you use SharePoint Designer 2013.

Step 1: Create a list for SharePoint workflow

  1. Login with SharePoint site.
  2. Navigate to Site and Click on “Settings” option and then click on “site contents” option.SharePoint Site contents
  3. Then click on “add an app” option.add an app
  4. Select “Custom list” option from the “your app” page. It will be popup for open create custom list.Custom List in SharePoint
  5. Give the proper name and click on Create button.Adding Custom List
  6. These steps will create custom list in site, now you can add multiple columns with different data type in this list.New SharePoint List
  7. Now open create custom list and go through list setting and click on “Create column” option and create multiple column with different data type as per need.Create Column in SharePoint
  8. I have added Current Date and Description filed in this list.

Note: We have created a simple List here but another SharePoint for Dummies article on Multiple Ways to Create a Custom List in Microsoft SharePoint 2013 is already covered here.

Step 2: Create workflow in SharePoint designer

  1. Open your SharePoint site in SharePoint designer.
  2. Click on “List and library” option in Navigation section.SharePoint Designer Lists and Libraries
  3. Select “TodaysDate” List and double click on it, it will open list’s properties.Custom List Properties
  4. Now, Click on “List Workflow” in ribbon bar and fill-up workflow information.List Workflows in Microsoft SharePoint
  5. It will open new window for workflow.New Window for Workflow
  6. Click on “Local Variables” in ribbon bar.Local Variables in ribbon bar
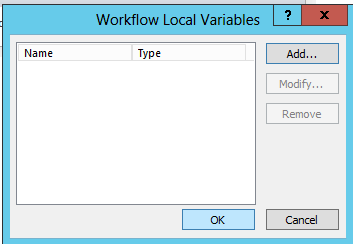
  7. It will open local variable window, where you can local add variable.Workflow Local Variables
  8. Add current date as local variable.Current date as Local Variables
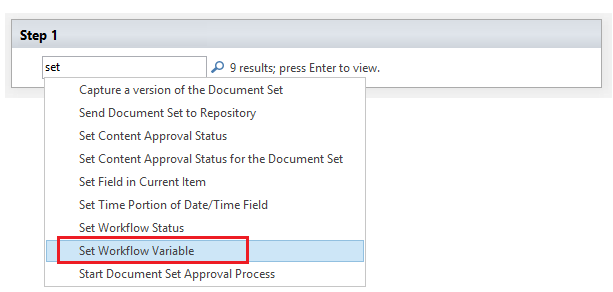
  9. Now, come on workflow part, write set and just click on search option and select “set Workflow variable”.Set Workflow Variable
  10. Now, click on “workflow variable” and select “CurrentDate” option from dropdown.Workflow Variable OptionsWorkflow Variable Select Options
  11. Now click on value field and set current date option.Workflow Option Value
  12. Now select under line option and select.Workflow Underline Options
  13. Select “set Field in current Item”.Set Field in Current Item
  14. Now, click on Field item and select “CurrentDate”.Current Date Field Item
  15. Now, click on Value filed and click on selected item.it will open one pop-up. You have to select Data source as “Workflow variable and parameters” and Field from source as “current date”.Look up for Field Item
  16. Click on workflow settings in ribbon bar.SharePoint Workflow Settings
  17. Select “Start workflow automatically when an item is created” option. This option our workflow will be automatically start on while any item is adding.Start Workflow Automatically
  18. Now click on Publish button in the ribbon bar. So our workflow will be publish and its ready to use.

Step 3: Microsoft SharePoint Workflow Check

  1. Open SharePoint site and open TodaysDate custom list.
  2. Click on new item. It will open popup for entering value. You have to just add Title field’s value and click on save button.Running New Item
    then….Add Item in SharePoint Workflow
  3. Now, our workflow will start and it will set current date field’s value and workflow will completed.Running Workflow

More related from Microsoft SharePoint For Dummies: